
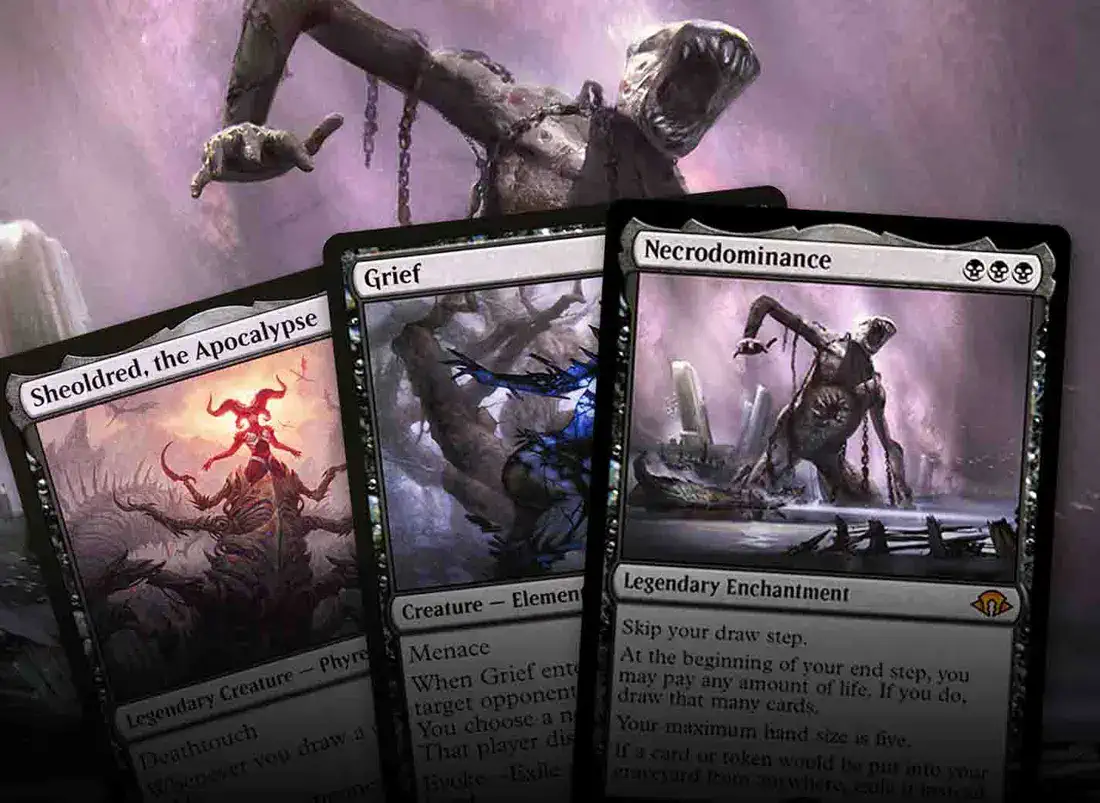
A "fixed" Necropotence is still a Necropotence
Modern Horizons 3 has revolutionized the format. Practically the entire Pro Tour MH3 meta consisted of decks that could not have existed (at least not in the same form) before the release of the new set. Even if Nadu, Winged Wisdom was the star of the tournament, every color and archetype will be forced to adapt to a changing format.
Today I'll be talking about Mono-Black Necrodominance, which was my chosen deck for the event (I finished 10-6 in 42nd place). Aside from Nadu, Necrodominance was the only archetype to put two players into the Top 8. One of those was Seth Manfield, who will no doubt also have great thoughts and stories to share on ChannelFireball.com. I believe Necrodominance was the most challenging deck I've ever played in a Pro Tour.
It was certainly one of the most fun and engaging. Our version – developed by Seth, Gabriel Nassif, and Raphael Levy – was heavily based on free spells and double-faced cards. For this deck, every card drawn can be used either at face value or as fodder to support an alternative game plan or strategy. Malakir Rebirth, for example, can be played as a land, discarded for Force of Despair, or cast targeting an evoked Grief to destroy the opponent's hand. The choice must depend on your draw, the matchup, and the specific circumstances of the game.
Mono Black Necrodominance
- 4 × Boggart Trawler
- 4 × Grief
- 4 × Orcish Bowmasters
- 2 × Shambling Ghast
- 2 × Sheoldred, the Apocalypse
- 4 × Fell the Profane
- 4 × Malakir Rebirth
- 4 × March of Wretched Sorrow
- 4 × Soul Spike
- 2 × Flare of Malice
- 1 × Force of Despair
- 4 × Inquisition of Kozilek
- 2 × Agadeem's Awakening
- 4 × Necrodominance
- 4 × The One Ring
- 6 × Swamp
- 3 × Phyrexian Tower
- 2 × Urborg, Tomb of Yawgmoth
- 3 × Break the Ice
- 3 × Dauthi Voidwalker
- 3 × Soulless Jailer
- 1 × Cling to Dust
- 1 × Fatal Push
- 1 × Force of Despair
- 1 × Leyline of the Void
- 1 × Thoughtseize
- 1 × Toxic Deluge
The Game Plan
Necrodominance has the familiar core of a black midrange deck. It plays discard spells, removal, Orcish Bowmasters, and the Grief "scam" package. While these strategies can generate a lot of advantage and heavily imbalance the opponent, ultimately you always want to land one of your engine cards: Necrodominance or The One Ring.
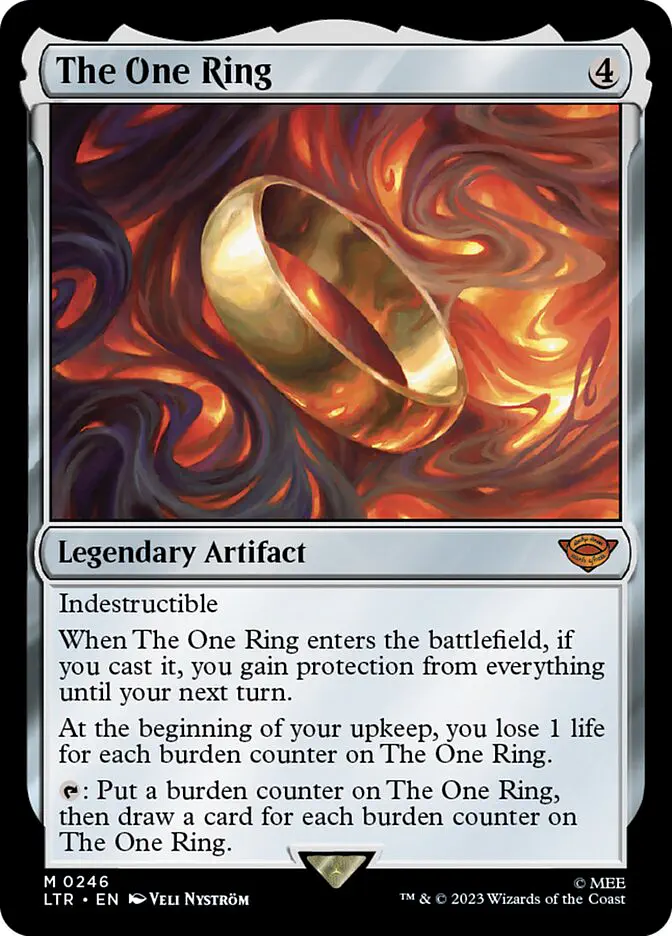
The One Ring
Legendary Artifact

Indestructible
When The One Ring enters, if you cast it, you gain protection from everything until your next turn.
At the beginning of your upkeep, you lose 1 life for each burden counter on The One Ring.
 : Put a burden counter on The One Ring, then draw a card for each burden counter on The One Ring.
Once you do, you'll draw cards at an unfair rate and use your numerous free spells to convert those cards into more practical advantages. The life gain from Soul Spike, March of Wretched Sorrow, and Sheoldred, the Apocalypse keeps the card flow going and makes the game unwinnable for the opponent.
Deck Structure
While Necrodominance might be the most important single card, this deck only works thanks to the combination of Modern's free spells and the recent influx of high-quality double-faced lands.
Grief, Force of Despair, Soul Spike, March of Wretched Sorrow
Both March of Wretched Sorrow, Soul Spike, Grief, and Force of Despair require you to exile black cards from your hand as a cost. Fortunately, a large part of your mana base (in our case, 14 out of 25 lands) can now consist of black cards. Instead of ending up with an excess of Swamps, these are all resources you can use for other purposes.
Malakir Rebirth, Boggart Trawler, Fell the Profane, Agadeem's Awakening
Keep this dynamic in mind when making changes to your Mainboard or Sideboard. Every additional non-black card (lands, artifacts, or various splashes) will make the deck less fluid.
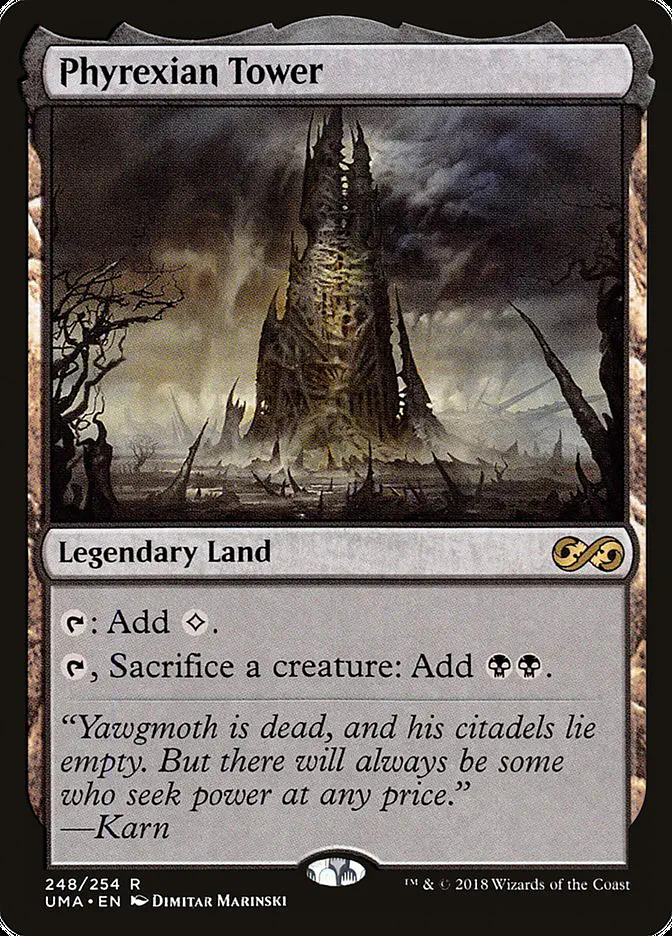
Phyrexian Tower
Legendary Land
: Add  .
.
, Sacrifice a creature: Add  .
.
Another key card is Phyrexian Tower, which makes the deck fast and explosive. Grief and Phyrexian Tower
are an amazing combination, as you can sacrifice the Elemental for mana with its evoke trigger still on the stack. This way you can cast a turn two Necrodominance or a turn three The One Ring, removing answers from the opponent's hand in the meantime and ensuring the coast is clear. Orcish Bowmasters is another natural fit, as it creates two creatures at such a low cost that you don't mind sacrificing one for mana.
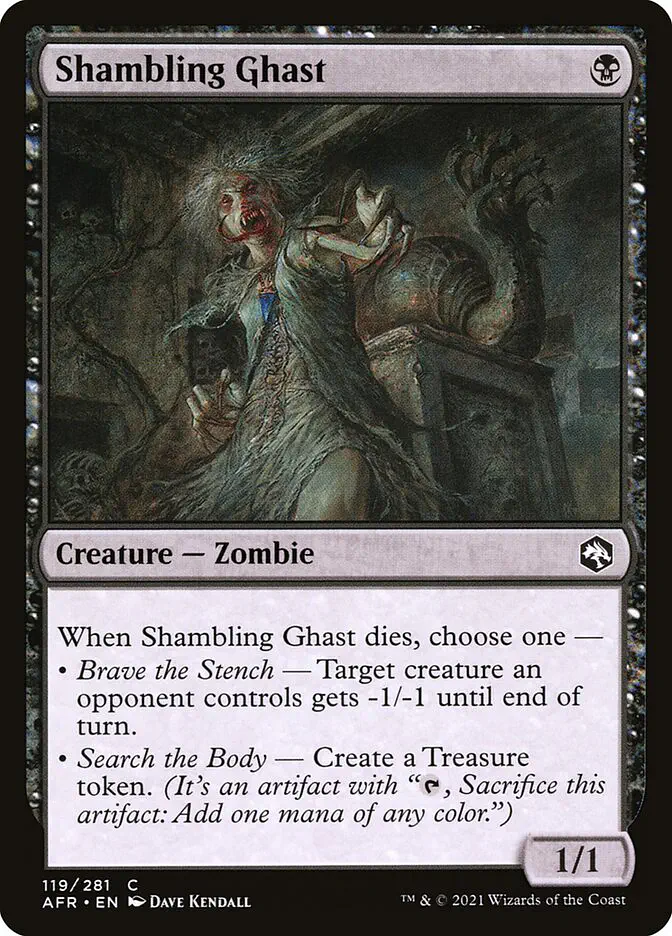
Shambling Ghast is certainly an unconventional choice in a format as powerful as Modern. However, we found it to be the glue that holds the deck together, offering a critical density of creatures to sacrifice to Phyrexian Tower and Flare of Malice.
Mulligans
The decision of whether or not to mulligan must respect the power of Necrodominance and how differently the deck plays when you have it compared to when you don't. It's perfectly acceptable to keep a hand without Necrodominance, for example, a Grief-based hand, or some interaction that fits well against the opponent's deck. However, it's quite difficult to win a game outright this way, so you'll often feel like you're buying time until you can draw Necrodominance or The One Ring.
A six- or five-card hand that can get Necrodominance into play will generally be better than a seven-card hand that cannot. So don't hesitate to mulligan seven mediocre cards, knowing that you can easily win games even with fewer starting cards.
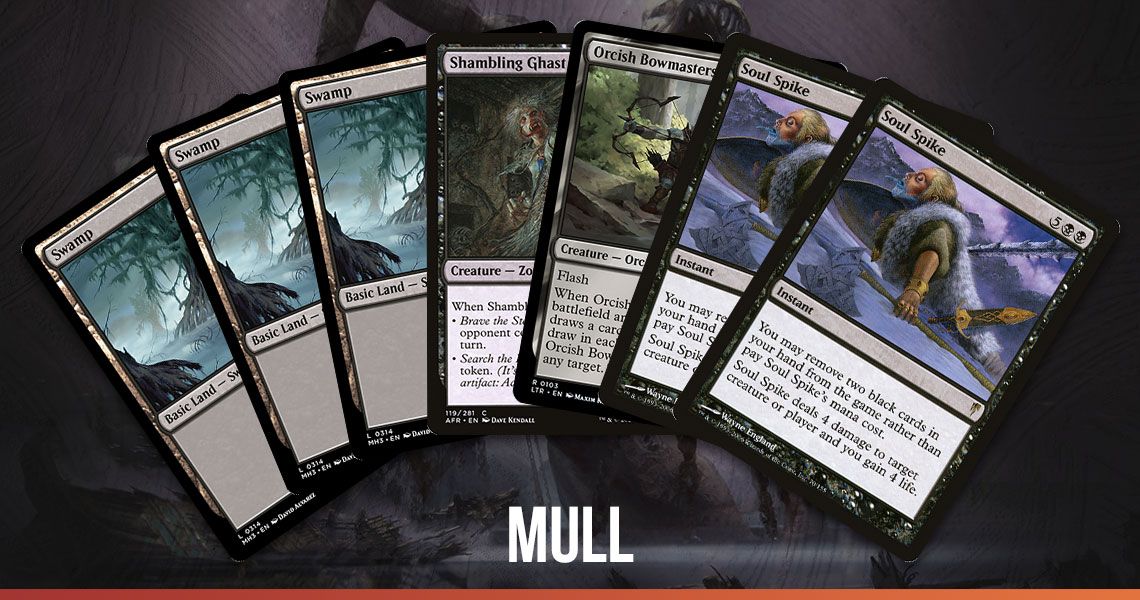
Swamp; Swamp; Swamp; Shambling Ghast; Orcish Bowmasters; Soul Spike; Soul Spike: mulligan
On the other hand, the presence of Necrodominance can justify keeping a hand without an early play, risking a hand that needs to draw a third land or is otherwise missing a piece. In other words, "turn one nothing, turn two nothing, turn three Necrodominance" is a solid opening in many matchups, especially when you are on the play.
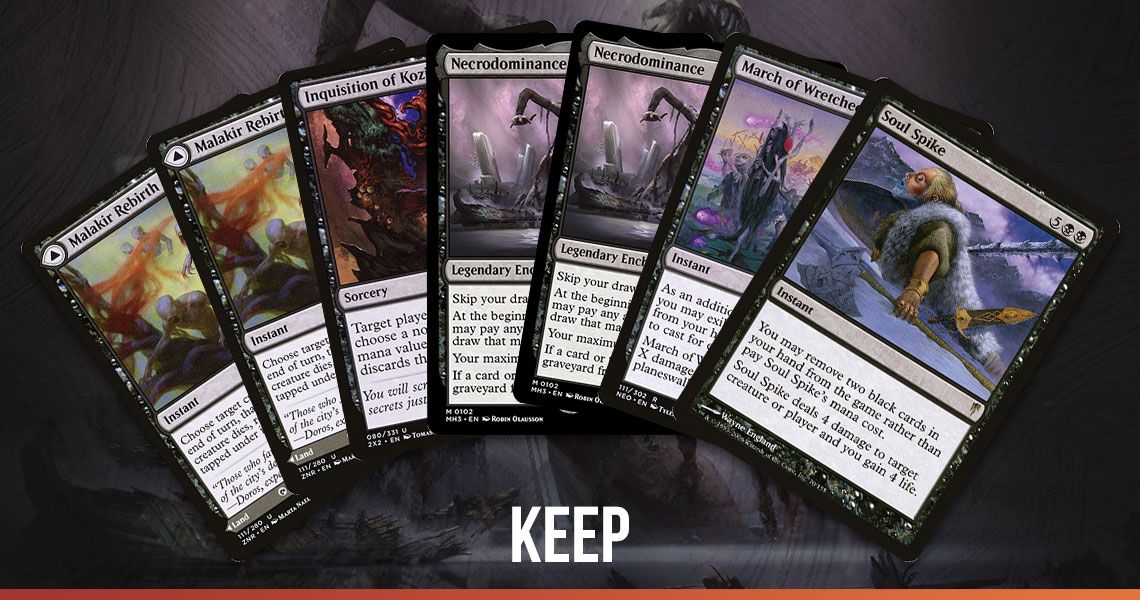
Malakir Rebirth; Malakir Rebirth; Inquisition of Kozilek; Necrodominance; Necrodominance; March of Wretched Sorrow; Soul Spike: keep
If you decide to mulligan to fewer cards, you'll often want to focus on getting Necrodominance or The One Ring into play, even if this slows you down. For example, after mulliganing, you should more seriously consider playing Boggart Bog as a land rather than discarding Boggart Trawler to evoke a simple Grief, or Soul Spike on their turn one Delighted Halfling. There will be plenty of time for those plays once you've activated your engine card.
How Many Cards Should I Draw?
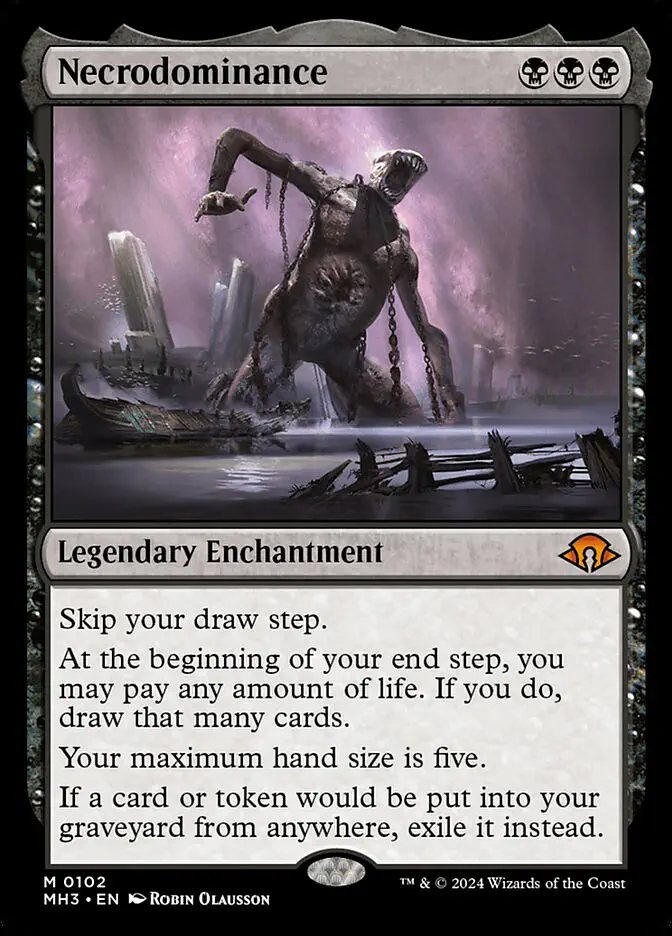
Necrodominance
Legendary Enchantment
Skip your draw step.
At the beginning of your end step, you may pay any amount of life. If you do, draw that many cards.
Your maximum hand size is five.
If a card or token would be put into your graveyard from anywhere, exile it instead.
The real Necropotence is a notoriously difficult card to use correctly, and Necrodominance is no different. One amusing moment during our Pro Tour prep saw me playing a game while Seth and Gab looked over my shoulders. I drew seven cards with my Necrodominance and then asked my teammates what they would do. Seth said he would only draw four cards. Gab said he would draw 12! And we'll probably never know which of us was closer to the right answer. These plays aren't obvious, and even experienced players can reasonably take very different approaches to the game.
However, I will outline a step-by-step process you can use to decide how many cards to draw on a specific turn.
Begin with two preliminary steps to determine if extreme decisions are necessary.
First step: Assess the risk of running out of cards in your deck or running out of threats. This doesn't happen often, but it can occur in some grindy control matchups, or if you've had to sideboard out or exile more key cards than you would have liked. In such cases, your priority becomes getting the maximum value out of your remaining cards. Don't overdraw and end up discarding spells that could have had long-term value.
Second step: Check if you have a life gain source. This means Sheoldred, the Apocalypse is on the battlefield, or March of Wretched Sorrow with available mana and a valid target. In these cases, the cards you draw will pay you back with life, so you can go deeper with much less risk.
Once these preliminary steps are complete, think about what you want your final five-card hand to look like when you end your turn, and work backward. If you're facing a value-focused midrange matchup, filling your hand to five cards will put you in a good spot, regardless of what those cards are, so there's no need to overdraw. Conversely, if your opponent is about to combo off with Nadu or Through the Breach, then you need to draw a lot of cards to give yourself the best chance of being prepared with Force of Despair or another removal spell.
How many cards do you already have in hand, and how strong are they? Imagine your board consists of three lands and Necropotence, and your hand contains a fourth land and Sheoldred, the Apocalypse. Well, these are already among the best cards you can have, so you're not looking to improve them. In this case, I would only draw up to five to eight cards. On the other hand, if you have no cards in hand or your hand is weak, then you should draw more cards to set up a strong play on your next turn.
Finally, think about casting Soul Spike during your end step. To maximize value, you should hold five cards in hand, and your Soul Spikes represent multiples of three cards beyond that. So, with one Soul Spike, eight cards is perfect so that you can discard two, cast Soul Spike, and hold five without discarding. With two Soul Spikes, eleven cards is perfect for the same reason.
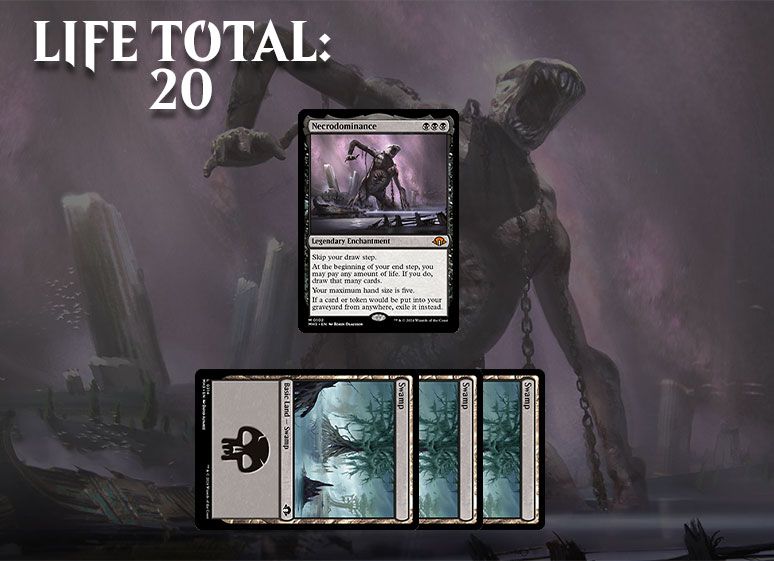
With this process in mind, let's return to the general case where you've just played Necropotence on turn three with a high life total. The most I would probably draw is 14 cards (let's say I have three in hand and draw 11 more). This is quite extreme, so I'm more likely to take this approach if I already have one or two Soul Spikes in hand, or if I feel a sense of urgency due to the matchup. The least I will probably draw is up to a full hand of five cards. If I have suboptimal cards in hand, such as too many lands or redundant copies of Necropotence or The One Ring, then I will draw a bit more to improve my hand and better shape my game plan.
TLDR: You should usually draw between four and twelve cards on the turn you cast Necropotence. You can draw more if you have a life gain source ready. When in doubt, don't overdo it because you're likely to be able to use those cards and that life even more effectively on subsequent turns.
Alternative versions
Our version of Necrodominance was very focused on "engine" cards, with four copies in the main deck of both Necrodominance and The One Ring. It was also heavily skewed towards double-faced lands/spells.
Mono Black Necrodominance
- 4 × Grief
- 4 × Orcish Bowmasters
- 3 × Sheoldred, the Apocalypse
- 3 × Sorin of House Markov
- 2 × Dauthi Voidwalker
- 1 × Boggart Trawler
- 4 × Fatal Push
- 4 × Soul Spike
- 3 × Malakir Rebirth
- 3 × March of Wretched Sorrow
- 2 × Fell the Profane
- 1 × Cling to Dust
- 1 × Not Dead After All
- 4 × Thoughtseize
- 4 × Necrodominance
- 7 × Swamp
- 3 × Castle Locthwain
- 1 × Bloodstained Mire
- 1 × Marsh Flats
- 1 × Phyrexian Tower
- 1 × Polluted Delta
- 1 × Raucous Theater
- 1 × Urborg, Tomb of Yawgmoth
- 1 × Verdant Catacombs
- 3 × Break the Ice
- 3 × Surgical Extraction
- 2 × Damping Sphere
- 2 × Pithing Needle
- 2 × Sheoldred's Edict
- 2 × Toxic Deluge
- 1 × Collective Brutality
It's interesting to highlight a very different build piloted by Noah Ma, who made Top 8 alongside Seth and dominated the tournament during the elimination rounds. His deck was more geared towards a classic black midrange deck that utilized Necrodominance as an excellent card, but could still function without it. He had more creatures like Dauthi Voidwalker and Sorin of House Markov, and his mana base included "value" lands like Castle Locthwain.
The decks and game plans are significantly different, and it wouldn't be useful to define one as better or worse than the other. However, perhaps there's something to learn by looking at the two decks side-by-side. Shambling Ghast is a fairly weak card, so perhaps moving slightly away from the Ghast + Flare of Malice + Phyrexian Tower package and more towards independent creatures and Castle Locthwain might represent an ideal balance point.
Tips and Tricks
Avoid violating the rules by forgetting to skip the draw step or putting cards into your graveyard while Necrodominance is on the battlefield. I started keeping a die on both my library and my graveyard, and I've found it helpful.
Malakir Rebirth will not work with Necrodominance on the field, so don't try it.
Necrodominance has a triggered ability that goes on the stack in your end step. If your opponent wants to prevent you from drawing, they'll have to destroy the enchantment in your main phase. If they want to get Orcish Bowmasters into play, they'll have to do so in response to the trigger, before you decide how much life to pay. You cannot stop Necrodominance with Pithing Needle.
It is not always necessary to evoke Grief at the first opportunity. Malakir Rebirth, Phyrexian Tower, and Flare of Malice are all ways to get additional value from the evoke. So I often like to wait and give myself a few more chances to draw one of these. If I can't, then I'll act when I need to clear the way to resolve one of my big enchantments, or when I'm worried my opponent is setting up their own combo or a big play.
Casting Soul Spike or March of Wretched Sorrow in your own end step is useful for reducing cards in hand, but there are times when you really need to keep these cards available during your opponent's turn. Against creature combo decks like Nadu or Yawgmoth, it is sometimes necessary to show discipline by discarding cards and saving Soul Spike to disrupt their combo.
Soul Spike is one of the cards you'll want to put on the bottom of your library after a mulligan. That said, this deck does not shuffle or search its library, so remember where Soul Spike is and don't get frustrated if it takes a while to draw it.
Don't underestimate the "spell" sides of your double-faced cards. While not efficient, I have cast Boggart Trawler, Fell the Profane, and Agadeem's Awakening to good effect in the Pro Tour. In particular, Boggart Trawler has a useful effect in Modern right now, and can also apply pressure when you are emptying your opponent's hand and board with your discard and removal.
Sideboard Guide
Bant Nadu
+1 Force of Despair
+1 Toxic Deluge
+1 Fatal Push
+1 Thoughtseize
-1 Agadeem's Awakening
-1 The One Ring
-2 Orcish Bowmasters
You may need to trim some free spells like Soul Spike if you see Vexing Bauble.
Sultai Nadu
+1 Force of Despair
+1 Toxic Deluge
+1 Fatal Push
-1 Agadeem's Awakening
-1 The One Ring
-1 Sheoldred, the Apocalypse
Red Storm:
+3 Dauthi Voidwalker
+3 Soulless Jailer
+1 Thoughtseize
+1 Leyline of the Void
+1 Cling to Dust
+1 Force of Despair
-2 March of Wretched Sorrow
-4 Orcish Bowmasters
-1 The One Ring
-2 Flare of Malice
-1 Shambling Ghast
Jeskai Control:
+3 Dauthi Voidwalker
+1 Thoughtseize
+1 Cling to Dust
-2 Flare of Malice
-1 Force of Despair
-2 Shambling Ghast
Grief Decks:
+1 Cling to Dust
+1 Leyline of the Void
+1 Fatal Push
+1 Toxic Deluge
-1 Force of Despair
-2 Flare of Malice
-1 Agadeem's Awakening
Eldrazi Tron / Urzatron Decks:
+3 Dauthi Voidwalker
+3 Break the Ice
+1 Thoughtseize
-2 Shambling Ghast
-2 Flare of Malice
-1 Force of Despair
-1 The One Ring
-1 Orcish Bowmasters
Eldrazi with Through the Breach:
+3 Break the Ice
+3 Dauthi Voidwalker
+1 Thoughtseize
+1 Force of Despair
-2 Shambling Ghast
-2 March of Wretched Sorrow
-1 Soul Spike
-1 The One Ring
-1 Flare of Malice
-1 Inquisition of Kozilek
Boros Energy:
+1 Fatal Push
+1 Toxic Deluge
+1 Force of Despair
+1 Cling to Dust
-2 Flare of Malice
-2 Shambling Ghast
Izzet and Jeskai Wizards:
+1 Fatal Push
+1 Cling to Dust
+1 Thoughtseize
+3 Dauthi Voidwalker
-2 Flare of Malice
-2 Shambling Ghast
-1 Force of Despair
-1 Sheoldred, the Apocalypse
Written by Reid Duke
Translated by ArabicLawrence