


Mono-Blue Belcher Deck Guide
Belcher is an all-in combo deck with a single goal: activate Goblin Charbelcher targeting the opponent. The deck leverages the fact that modal double-faced cards (MDFCs) are not technically lands on their non-land side. Consequently, when Goblin Charbelcher is activated, it reveals virtually the entire deck and deals more than enough damage to immediately close the game in the vast majority of cases. The rest of the deck is built to find, accelerate, and protect the combo.
This is the decklist that won (9-1) yesterday's 109-player Modern Challenge 64 on May 22nd:
Tameshi Belcher

What are Belcher's strengths?
Since it's a one-card combo capable of winning out of nowhere, Belcher's gameplan is quite simple to execute consistently. The deck combines a stable goldfish time with numerous interaction pieces, primarily counterspells.
This, coupled with the eight virtual copies of the deck's namesake card thanks to Whir of Invention, makes the deck quite resilient against commonly played hate. Overcoming discard, counterspells, or artifact removal is not an insurmountable problem. The deck also has maindeck answers to direct hate thanks to the playset of Sink into Stupor in the manabase.
Because spell-lands can often function as actual spells, Belcher has more options to deal with hate or the opponent's plan than a typical dedicated combo deck. It is also well-positioned to keep other combo decks in check, thanks to a good number of free counters supported by a relatively fast and easy-to-assemble kill.
What are Belcher's weaknesses?
In my opinion, the deck's main problem is its manabase. Since we can only use MDFCs, the options are very limited. It ends up being a monocolor manabase that doesn't support casting its own spells very well, mainly due to the number of taplands we are forced to play. Even untapped sources are very costly: three life per land is not insignificant at all.
Consequently, Belcher struggles against fast aggro decks. Another big problem is mana denial with cards like Boseiju, Who Endures or White Orchid Phantom, against which we can't do much outside of countermagic. The fact that Consign to Memory is one of the most played cards in current Modern also doesn't help the archetype.
Finally, there are some hate cards that can turn Belcher's main strength into a weakness and immediately close the game. The most common are exile effects, such as Surgical Extraction and Extirpate.
Main Gameplan and Deckbuilding Decisions
Since the deck's inception, Belcher's gameplan has always been extremely simple: activate Goblin Charbelcher. In the past, depending on the format, the deck focused mainly on speed. For this reason, it was often accompanied by various forms of fast mana, usually with a red component.
Blue Belcher approaches the problem differently. Instead of trying to kill as quickly as possible, it sacrifices one or two turns of speed to compensate with interaction capable of both protecting the combo and disrupting opposing plans.
To still be able to close the game around turn four, Belcher incorporates the trio of Lotus Bloom, Tameshi, Reality Architect, and Whir of Invention. This package provides the necessary speed and, at the same time, the flexibility to deal with hate more effectively.
We can thus distinguish three main victory lines.
- The first is Tameshi Bloom, the most combo-oriented plan. It generates a lot of mana and allows for resolving complex situations simply by offering many options during the combo's execution. It's capable of killing as early as turn four by producing enough mana and cards to put Goblin Charbelcher into play with multiple layers of protection. This plan is only possible thanks to Lotus Bloom.
- The second is Belcher Control. Here, we simply slow down the opponent with countermagic and bounce spells long enough to untap with Goblin Charbelcher in play. This usually means killing from turn five onwards, when the opponent has already expended most of their resources.
- The third is the attrition plan with post-sideboard answers and support permanents. In the updated version, Harbinger of the Seas is no longer present, so the old "prison" plan based on turning all lands into Islands is no longer part of the list. Instead, the deck adopts a cleaner approach: more counters, more bounce, Engineered Explosives as a flexible answer, and Tamiyo, Inquisitive Student as a source of advantage.
The two main plans, namely Tameshi Bloom and Belcher Control, have pros and cons. Knowing which to choose based on the matchup and board state is a fundamental part of learning the deck.
Since Belcher's card pool is very limited, the maindeck doesn't change much. Sideboards also tend to be quite similar: some cards can be changed based on the expected metagame, but it's more about deciding which categories of hate or answers to cover, not choosing between thirty truly equivalent options.
The Combo Core
Goblin Charbelcher
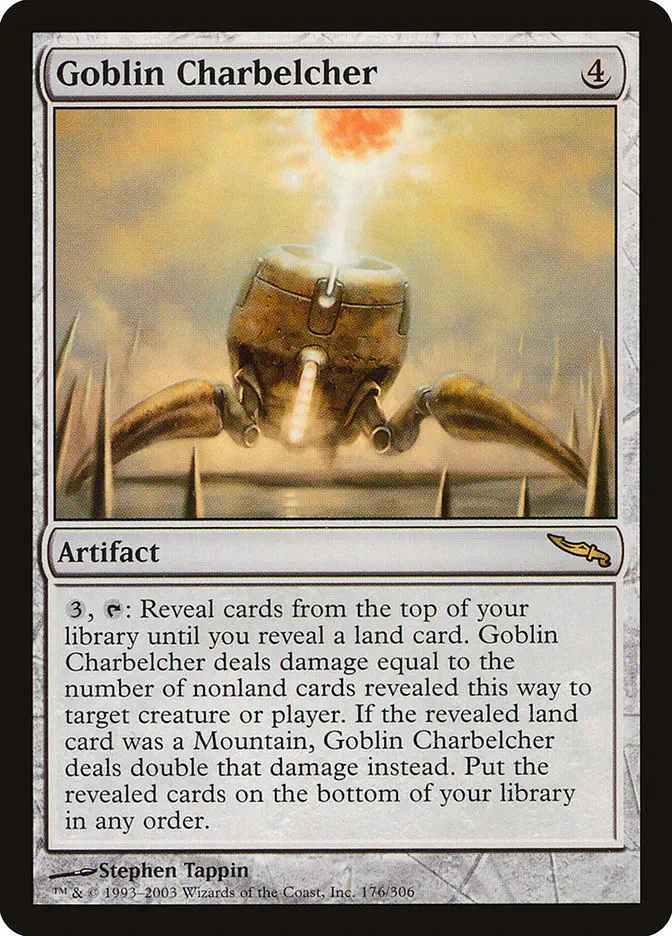
Goblin Charbelcher
Artifact

 ,
,  : Reveal cards from the top of your library until you reveal a land card. This artifact deals damage equal to the number of nonland cards revealed this way to any target. If the revealed land card was a Mountain, this artifact deals double that damage instead. Put the revealed cards on the bottom of your library in any order.
The one-card combo and the reason you're reading this article. A single activation deals approximately fifty damage, enough to close the game in the vast majority of situations.
Whir of Invention + Tameshi, Reality Architect + Lotus Bloom
I like to call it the “fast mana trio.” These three cards are in the deck primarily because of how well they work together, which is why it makes sense to group them.
Lotus Bloom is the key card. It's solid even on its own, as it allows you to go from four to seven mana, exactly the amount needed to cast and activate Goblin Charbelcher. Its existence transforms Tameshi, Reality Architect into a true combo engine: with Lotus Bloom in play or in the graveyard, every land can become an indirect source of additional mana.
If you have Tameshi, Reality Architect in play, Lotus Bloom in the graveyard, and even just one white mana source, three lands are enough to reach seven mana. Compared to simply suspending Lotus Bloom, Tameshi, Reality Architect requires fewer untapped lands, which means taking less damage from the manabase—a very important factor against aggro.
The more lands you have, the more mana you can produce. Ideally, you'll have enough to execute the combo and protect yourself. It's worth noting that the lands you bounce during the process can be the protection itself: Sink into Stupor and Jwari Disruption are the most obvious examples.
Whir of Invention is the glue of the engine. It allows you to find Lotus Bloom to start the combo or Goblin Charbelcher once a large amount of mana has been generated. It can also simply be used as a regular tutor for Goblin Charbelcher on turn four if you suspended Lotus Bloom on turn one, or as a way to search for a sideboard artifact when needed.
The New Creature Package: Hydroelectric Specimen + Tameshi, Reality Architect
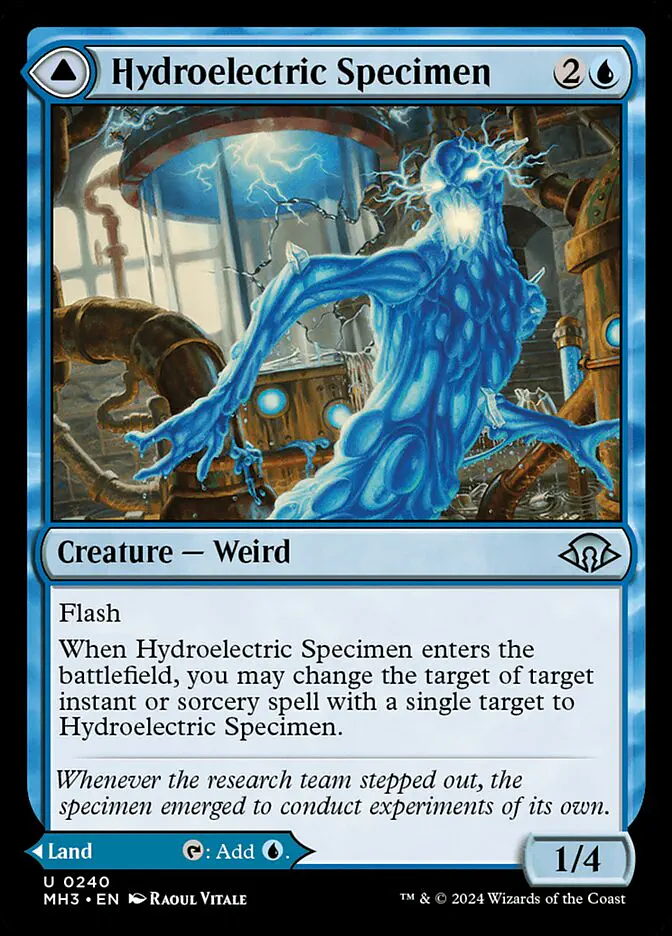
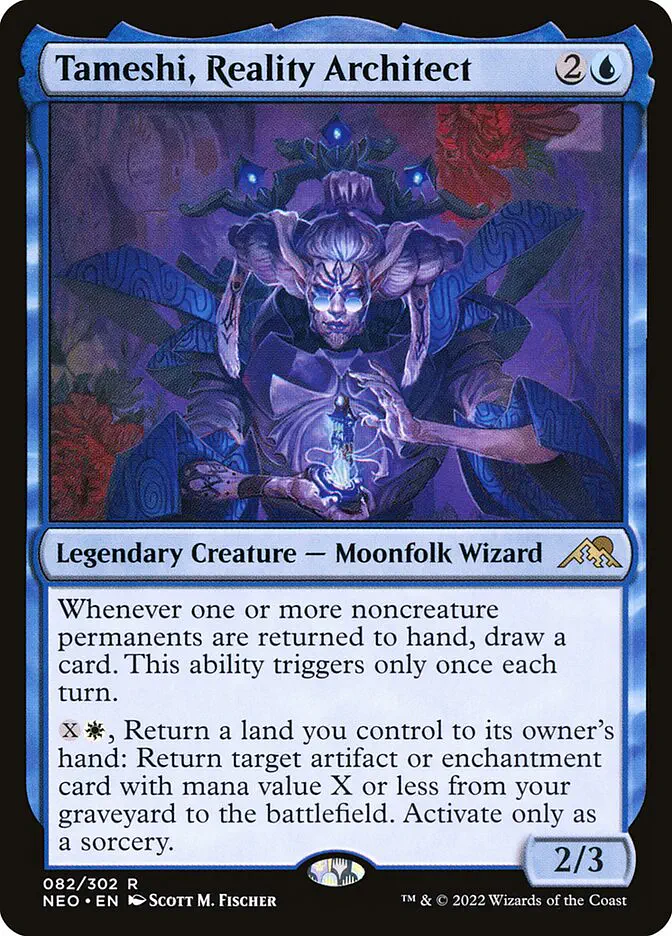
The updated list no longer plays the old package with Thundertrap Trainer, Fallaji Archaeologist, and Flare of Denial. This significantly changes how the deck builds its resources.
Hydroelectric Specimen is the new main support creature. It serves several roles: it's a blue card for Disrupting Shoal, it's an untapped land when needed to develop the manabase, it can act as a body on the field, and in some games, it allows for useful use of unspent mana. It's not a selection engine like the old creature-cantrips, but it's much more consistent with a list that wants to reduce weak slots and maximize modal double-faced cards.
Tameshi, Reality Architect, on the other hand, remains the deck's true engine. In addition to generating mana with Lotus Bloom, it can create card advantage and turn some long games into situations almost impossible for the opponent to recover from.
The substitution is conceptually clear: fewer cards dedicated to supporting Flare of Denial, more individually functional cards, more traditional counters or high-impact pitch spells, and a more direct structure towards Whir of Invention and Tameshi, Reality Architect.
Interactive Spells
Disrupting Shoal
Disrupting Shoal is one of the most important free counters in the deck. Unlike Force of Negation, it can counter creatures and can be pitched even on our turn, making it a perfect addition to the strategy.
Historically, Disrupting Shoal hasn't been played much because exiling a blue card with a specific cost is complicated. Belcher makes this requirement much simpler, given that lands are also spells. Given the curve distribution, it's mainly used to counter two and three-cost spells. Remember that it can also be cast normally: in the midgame, it's very effective at stopping cards like Living End or one-drops.
Force of Negation
The new list plays the full set of Force of Negation, and this is a substantial difference from some previous versions of the primer. Almost all cards in the deck are blue, so the pitch cost is sustainable, and current Modern requires free answers to combos, planeswalkers, engines, and decisive interactions.
Force of Negation is particularly important because it allows the deck to not always have to choose between developing the combo and holding mana open. It protects Goblin Charbelcher, defends Whir of Invention, and allows interaction against explosive strategies without losing your own turn.
The limitation is always the same: trading two cards for one isn't free. Belcher doesn't have a huge amount of natural card advantage, so it's necessary to avoid using Force of Negation on secondary threats unless necessary. However, in the current metagame, the playset is justified by the need to respect combos and stack interaction.
One-Mana Counters: Spell Snare, Stern Scolding, and the like
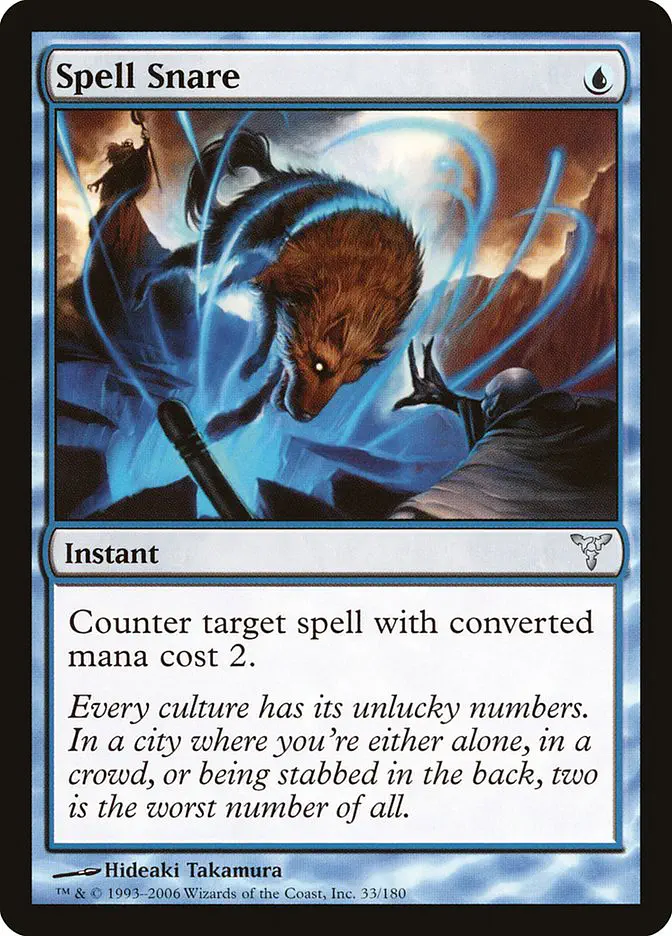
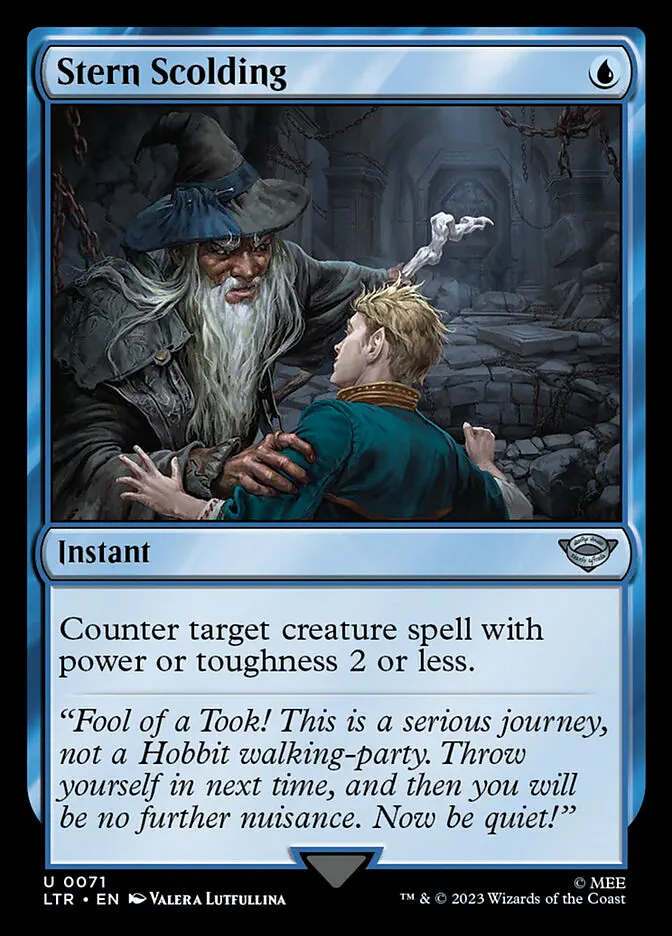
Paying one mana for conditional countermagic is much worse than paying zero. The window of utility is narrower, and since it requires holding mana open, the play is much more telegraphed. Imagine being on the draw, paying three life for an untapped land, and passing: many Energy players will simply choose to play a one-drop and take a surveil land, instead of walking their two-drop into an obvious Spell Snare.
Despite these flaws, one-mana counters have two great advantages: they don't require additional resources beyond mana and they increase the number of low-cost answers in a list that needs to survive the early turns.
Spell Snare is quite safe, as almost all decks have at least one premium target. Stern Scolding is an elegant way to combat metagames full of small but decisive creatures. Spell Pierce can win counter wars and catch other combo decks by surprise, but being quite weak against Consign to Memory, it sees less play than in the past.
Into the Flood Maw, on the other hand, plays a different role: it's not a counter, but a universal answer to permanents already resolved. The winning list plays three copies, a very clear signal that the deck wants concrete ways to buy time and remove hate from the battlefield.
The Manabase
One of Belcher's most unique aspects is its manabase. Unlike any other Modern deck, modal double-faced cards open up new possibilities but, at the same time, impose enormous constraints.
Pros
- Not having real lands makes Goblin Charbelcher lethal in almost any situation. This is obviously the most important argument for playing such a manabase; without this interaction, there would be no point in going so far as to exclusively play MDFCs.
- Spell-lands can function as spells. Fortunately, each one played in the deck has at least a minimal impact. For this reason, you should think twice before making a land drop: that card could be a decisive spell on the next turn.
- They increase the number of blue cards for Disrupting Shoal and offer a good distribution of mana values. For example, thanks to Beyeen Veil and Jwari Disruption, there are enough two-cost cards to consistently counter two-cost spells via Disrupting Shoal, which is extremely important against Energy or Prowess.
- Sink into Stupor acts as a maindeck answer to permanent-based hate. For this reason, Belcher doesn't need to play as many specific answers to cards like Pithing Needle or Stony Silence as one might think.
Cons
- The manabase forces us to play taplands, which are obviously terrible when it comes to playing on curve. Having two or more taplands in your opening hand can slow you down by an entire turn, and there's not much you can do to avoid it.
- All untapped MDFCs cost three life if they enter the battlefield untapped on their land side, making the manabase quite painful. If you want to play on curve every turn, you'll likely have to pay nine life to do so.
- It makes us vulnerable to land destruction effects. Since we don't play basic lands in the maindeck, against Boseiju, Who Endures or White Orchid Phantom we won't find anything. The updated sideboard tries to mitigate this problem with one Island and one Mountain.
- Splashes are almost out of the question. The deck already needs to support Suppression Ray for Tameshi, Reality Architect's white mana, but going beyond that becomes very difficult, especially since Whir of Invention requires triple blue.
What individual spell-lands do
- Sink into Stupor: costs three for the purpose of Disrupting Shoal. It's easily the best land at our disposal. It's primarily used to bounce problematic permanents or threats, buying time. It can also interact with spells on the stack, which is relevant in counter wars, especially after generating a lot of mana with Tameshi, Reality Architect and Lotus Bloom.
- Sea Gate Restoration: costs seven, so it's rarely used for Disrupting Shoal, although it can sometimes counter Murktide Regent or a seven-mana Eldrazi to buy time. It can become a great source of card advantage once Tameshi, Reality Architect and Lotus Bloom are assembled. Since Tameshi, Reality Architect returns lands to hand, it fuels Sea Gate Restoration, often allowing you to draw more than seven cards and increasing the chances of finding and protecting Goblin Charbelcher.
- Hydroelectric Specimen: costs three for the purpose of Disrupting Shoal. It's a creature, so it doesn't function as a spell to tutor or select in older configurations, but in the updated list it plays an important role: it's an untapped blue source, a pitchable card, a body, and a spell that can be used when we have excess mana. Its triggered ability won't always be central, but having an untapped blue MDFC with real utility is a huge advantage.
- Jwari Disruption: costs two for the purpose of Disrupting Shoal. Sometimes it catches the opponent by surprise and generates value. It's not always clear whether to play an untapped land on turn two and represent it or not: it depends on the matchup and who is on the play.
- Beyeen Veil: costs two for the purpose of Disrupting Shoal. Often functions as a sort of Fog, which is relevant against Energy and other aggressive decks.
- Suppression Ray: costs five for the purpose of Disrupting Shoal. When cast, it doesn't do anything exceptional, but it's one of the fundamental white sources for Tameshi, Reality Architect. It allows you to start the combo with Lotus Bloom in the graveyard or even retrieve Goblin Charbelcher.
- Waterlogged Teachings: costs four for the purpose of Disrupting Shoal. Sometimes it's cast as an expensive tutor for countermagic in blue matchups or to indirectly find Goblin Charbelcher via Whir of Invention. It's useful against Consign to Memory because it allows you to set up longer games with more resources.
Sideboard Options
As mentioned earlier, due to mana restrictions from being monocolor and playing numerous taplands, Belcher has a rather limited range of sideboard options. These usually consist of various types of countermagic, one or two bounce spells, a basic Mountain, and three to five other cards, such as Harbinger of the Seas, targets for Whir of Invention, and so on.
Consign to Memory
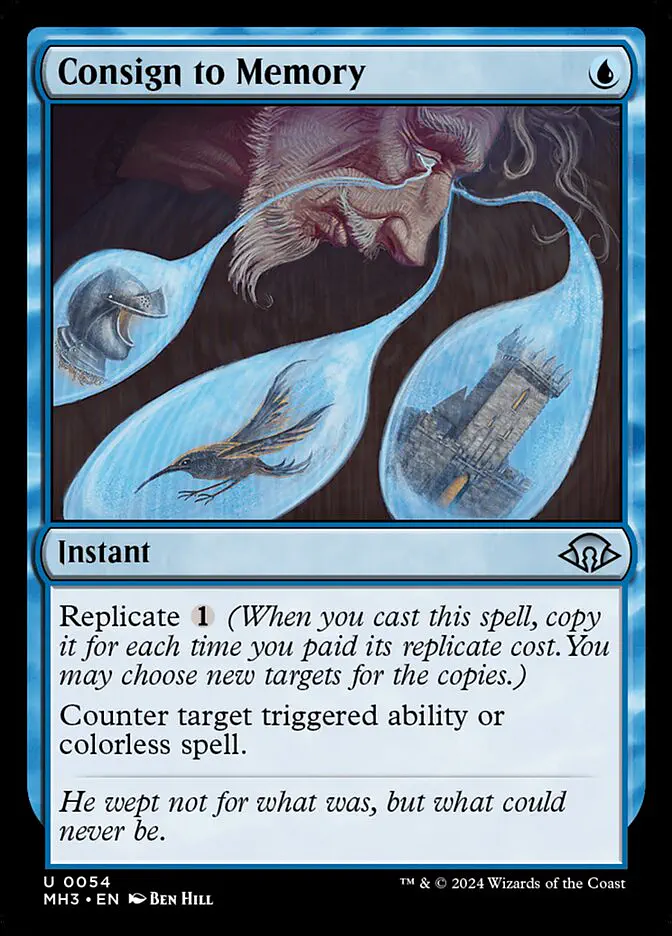
In my opinion, it's the most impactful card in Belcher's sideboard and probably the best blue card in the format. I would never play fewer than three copies, and even playing the full playset is rarely a bad idea. Its main purpose is to counter both spells and cast triggers against Eldrazi. It's also strong in the mirror match, as well as against Amulet, where you can counter the deck's namesake card, the Primeval Titan trigger, and many other things; against Storm, where it can hit Ruby Medallion and, sometimes, a Grapeshot Storm trigger; against Broodscale and so on. If you find yourself in a tight spot, you can also consider some copies against opponents with problematic triggers, such as decks with White Orchid Phantom.
Flusterstorm
Flusterstorm, on the other hand, is probably one of the best answers to Consign to Memory: thanks to Storm, it's possible to counter the original plus all copies created with Replicate, assuming enough spells have been cast beforehand. If the opponent relies too heavily on Consign to Memory with only one extra copy, this is our way to break free for just one mana. It's also solid against other spell-based combos, like Neoform or Living End.
Mystical Dispute
In my experience, it's more often used to stop the opponent than to protect our combo. It's an excellent answer to Psychic Frog, Teferi, Time Raveler, Quantum Riddler, and so on. It's also solid in the mirror match, because you can play it early to counter their creature-cantrips, denying them access to Flare of Denial. Of course, there are many other very interesting targets: Neoform, Force of Negation, Kappa Cannoneer, and so on. In my opinion, playing two or three copies is safe.
Tezzeret the Seeker
It's a Goblin Charbelcher that costs one more mana and cannot be countered by Consign to Memory, simple as that. Its second ability can also tutor for Lotus Bloom, which is useful if you want to build mana but don't want to expose Goblin Charbelcher to an obvious Boseiju, Who Endures or something similar. I'm in favor of playing the first copy; sometimes a second can also be considered.
Stock Up
The best Divination we have access to; perhaps Brainsurge can compete, but I don't see strong reasons to play it instead of Stock Up. It's an excellent tool in slower matchups, helping to find all the combo pieces and interaction at the right times. Playing the second copy in the sideboard is practically free; in slower metagames, I would even consider the third.
Hurkyl’s Recall
If you really want to keep all heavily artifact-based decks in check, Hurkyl’s Recall is the card for you. Excellent against Affinity, acceptable against Broodscale.
Harbinger of the Seas
Harbinger of the Seas does not significantly contribute to our strategy, perhaps aside from smoothing out our future land drops, as all lands would enter untapped and without paying life. It was included in the deck simply because it's a powerful card against several popular archetypes and doesn't affect our manabase in any way.
It's not the best three-drop, because reliably casting it on turn three with twelve taplands in the deck is far from simple; it loses value when we're on the draw and it's the only sideboard card we can't find with Thundertrap Trainer and Fallaji Archaeologist. However, the raw power of the card is extremely high: it has the potential to disrupt the opponent's draw while aiding our development. For this reason, it often occupies two or three sideboard slots and, sometimes, even finds space in the maindeck in one or two copies if the metagame is favorable.
Into the Flood Maw
I've already mentioned it before, but if you're worried about anything that stays on the battlefield and bothers you, Into the Flood Maw is the best tool to respond, apart from countermagic. Players usually run two or three copies in the deck, but I can see that number varying based on the expected metagame.
Suspend
Another one-mana bounce effect. Unlike Into the Flood Maw, it's quite narrow, but it can solve problems for more than just one turn. It's probably our best tool against Prowess, even though the matchup remains terrible regardless.
Unable to Scream
If you're looking for a one-mana removal spell in mono-blue, Unable to Scream is a solid inclusion against aggro and against Green Sun’s Zenith decks that play Collector Ouphe.
Portable Hole
Although it's difficult to cast at its full cost, Portable Hole is played as a cheap target tutorable with Whir of Invention, allowing it to answer some of the most problematic permanents for Belcher, such as Stony Silence, Collector Ouphe, Pithing Needle, and so on. Four mana for a one-for-one answer can sometimes seem a bit too expensive, but we don't have access to anything better.
It's worth noting that you can use cheap artifacts already in play like Portable Hole, Tormod’s Crypt, or Clues to reduce the cost of Whir of Invention, so you can find Goblin Charbelcher earlier.
Tormod’s Crypt
Another tutorable interactive card. This can easily be searched with Whir of Invention on turn three, fitting well into our curve. It's solid against anything that relies on the graveyard to win, like Goryo, Living End, and so on. I've also seen some players bring it in during the mirror match to disrupt the Tameshi, Reality Architect combo, although personally I'm not a big fan.
Tamiyo, Inquisitive Student
Tamiyo, Inquisitive Student is a powerful card, and some players include it in Belcher as a way to generate card advantage over time and to help accelerate Whir of Invention by tapping Clues for Improvise. Personally, I'm not a big fan, especially given how crowded our curve becomes from turn two onwards. It's quite difficult to find the time to sacrifice Clues, so they often end up staying on the battlefield for multiple turns. In my opinion, there are more urgent cards to prioritize in the sideboard before even considering Tamiyo, Inquisitive Student.
A Basic Land
First, let's discuss the most unusual card in Belcher's sideboard. It serves as a solution to mitigate the impact of land destruction, which is heavily played in Modern. These cards usually destroy a land, but allow its controller to search for a basic land card or a land with a basic land type. By adding a basic land to the deck, we ensure we can find something, which means the first land destruction effect won't significantly impact our speed.
Mountain and Island are two reasonable choices. The former is considered because it doubles the damage produced by Goblin Charbelcher when it reveals a land, thereby reducing the chances of not killing the opponent. Island, on the other hand, better supports casting our spells and is quite important when we want to cast Whir of Invention for X=0 for Lotus Bloom on turn three. In my opinion, Island is overall the safer choice.
Important Plays and Tricks to Know
- Think twice about which land to play, both for what the spell side does and whether it enters tapped or untapped. Sometimes the spell side will be more important than the mana source, or its cost will matter for Disrupting Shoal. The timing of taplands is often crucial: for example, if you need to win on turn four and don't have a suspended Lotus Bloom, it might be correct to play a tapland on turn two instead of casting a spell. This way, you can cast Whir of Invention on turn three, and if you draw Tameshi, Reality Architect, go off on turn four. Always plan ahead.
- Whir of Invention is an instant. This often matters when your opponent wants to deal with your Lotus Bloom just coming off Suspend. In response to removal, you can sacrifice it and use the three mana to cast Whir of Invention and search for another copy.
- Whir of Invention has Improvise. This means you can tap artifacts already in play, such as Engineered Explosives or Clues from Tamiyo, Inquisitive Student, to find Goblin Charbelcher earlier than expected.
- Be careful when casting Disrupting Shoal on a spell with X. For example, Green Sun's Zenith cast with X equal to two will have a mana value of three on the stack, while an opponent's Disrupting Shoal with the same X will have a mana value of four.
- It is legal to cast Disrupting Shoal by paying its normal cost.
- Tameshi, Reality Architect's activated ability can only be used when the stack is empty and during your main phase. Therefore, do not try to float mana and activate Tameshi, Reality Architect in response to Surgical Extraction on Lotus Bloom: it won't work.
- Tameshi, Reality Architect's triggered ability, however, does not have the same limitation. Furthermore, it is not only triggered by lands: you can also draw cards thanks to Into the Flood Maw and Sink into Stupor, or if the opponent uses Otawara, Soaring City on your Goblin Charbelcher. Be careful not to forget these draws.
- With effects like Harbinger of the Seas in play, all lands would enter untapped and without paying life. However, this line is no longer part of the updated list, as Harbinger of the Seas does not appear in the winning deck's sideboard.
- Consign to Memory can respond to many different threats and hate cards, including opposing Consign to Memorys. You can counter the Replicate trigger, leaving only the original to deal with. You can also counter Urza's Saga chapters, preventing it from creating Constructs or tutoring.
- If for some reason the opponent doesn't die after activating Goblin Charbelcher, for example due to infinite life or Spellskite, you can order your deck. The cannon puts the revealed cards on the bottom in any order, not randomly.
Frequently Asked Questions
How aggressively should I mulligan?
The best answer comes from the victory lines explained above. In theory, both the Tameshi Bloom plan and the Belcher Control plan should be powerful enough to at least give you a chance against any deck. In practice, however, one of the two is often clearly superior.
For example, against another combo deck it is often better to prevent them from winning rather than simply trying to race. Conversely, against an aggro deck, it is much better to aim for a turn four kill and hope that a single piece of interaction in the early turns is enough to slow them down.
The Tameshi Bloom plan handles mulligans quite well, as it can win with relatively low resources. The Belcher Control plan, on the other hand, requires more cards to sustain attrition battles. Try to exploit this advantage in open decklist tournaments. If I don't know what I'm playing against, I tend not to aggressively mulligan for the fastest hands and am willing to keep solid but slower hands.
Should I always wait for seven mana to cast and activate Goblin Charbelcher in the same turn?
If possible, you should always try to cast Goblin Charbelcher when you can also activate it as soon as it enters the battlefield. This way, you don't give your opponent a chance to destroy it before it fires.
However, in some cases it's worth taking the risk. For example, if the opponent plays blue and is tapped out, if you don't have time to wait for seven mana, if you have Lotus Bloom arriving on turn four with two lands on the field, and so on.
How to maximize the impact of counterspells?
It obviously depends on the matchup, but we can distinguish two main ways of using countermagic, each linked to one of Belcher's main plans.
In opening hands with Tameshi, Reality Architect, I tend to save counterspells for the combo turn. In more control-oriented games, however, I often counter the first truly significant threat presented by the opponent.
In general, when deciding whether to cast a counterspell, ask yourself three questions:
- What do I want to achieve?
- What are the consequences if the opponent resolves this spell?
- Is there a more threatening card that could put me in an even worse position if I use the counter now?
Is winning by attacking with creatures a reasonable backup plan?
During testing, combat damage from the Belcher side rarely matters. In older versions, it could happen with Harbinger of the Seas, but this line is not present in the updated list.
The deck's creatures primarily serve to support the strategy: Tameshi, Reality Architect is an engine, Hydroelectric Specimen is a functional MDFC and sometimes a useful body. However, combat should not be considered a realistic win condition, except in very marginal cases.
How do I handle hate?
Since Belcher is a one-card combo, it leaves many free slots that can be used to accelerate your own plan or interact with the opponent. For this reason, the deck has tools to combat a wide range of threats: countermagic covers everything from discard to opposing counters, from permanent-based hate to enemy combos.
The main challenge is finding ways to respond to all hate cards in time. This is where the deck suffers the most, especially against decks with a fast clock like Energy or Domain.
To combat hate, we should choose cards that are as cheap as possible, thereby reducing the opportunity cost of including them in our setup. It's also essential to understand the most efficient ways to neutralize the opponent's key hate cards.
- Consign to Memory may seem difficult to beat when playing Belcher, but there are several ways to neutralize it. The simplest is to use Whir of Invention instead of directly casting Goblin Charbelcher, or to put the cannon into play via lines with Tameshi, Reality Architect. Both often require Lotus Bloom, but between Whir of Invention and Suspend, it's quite realistic to get there.
- Another way to deal with Consign to Memory is simply to counter it. If the opponent doesn't replicate it, it's quite simple; if they do replicate it, you can counter the Replicate ability with your own Consign to Memory, leaving only the original to deal with.
- Pithing Needle and other effects that prevent activating Goblin Charbelcher can be overcome with bounce spells. The Tameshi Bloom combo helps a lot because it allows you to generate enough mana for cards like Sink into Stupor or Into the Flood Maw. It's more complicated against hate that also affects Lotus Bloom, such as Stony Silence, Collector Ouphe, or Karn, the Great Creator. Against these cards, it's advisable to save countermagic and, if they resolve, try to bounce them at the end of the turn.
- Haywire Mite is very effective at preventing you from reaching seven mana during the main phase. The most common pattern is to exile Lotus Bloom after it has been tutored with Whir of Invention at the end of turn three, or on turn four after it has come off Suspend, but still during the upkeep. The simplest way to get around it is to use the mana from the first Lotus Bloom to cast Whir of Invention and find another copy. Alternatively, you can try to bounce Haywire Mite and go off on your turn.
- Another option is to cast Whir of Invention for Lotus Bloom on turn four, immediately sacrifice it for three white mana, play an untapped land, cast Tameshi, Reality Architect, and go off that way. This line produces more than enough mana to cast and activate Goblin Charbelcher, leaving Haywire Mite very few windows to interfere.
Is graveyard hate good against Belcher?
Some players bring in graveyard hate against Belcher because it blocks the Tameshi Bloom combo. While it can sometimes be relevant, it is generally marginal, because Lotus Bloom can do a lot of work even without Tameshi, Reality Architect.
Moreover, the Moonfolk can still be used as a blue card for Disrupting Shoal or as an alternative development piece. It's also possible to overcome one-shot graveyard hate by having two copies of Lotus Bloom. For this reason, you shouldn't worry too much about graveyard hate. If the opponent brings in heavy cards like Leyline of the Void or Rest in Peace, you can consider reducing or cutting Tameshi, Reality Architect and relying more on the Belcher Control plan.
Considerations on the list post May 18, 2026 ban
The winning version of the Modern Challenge shows a clear evolution compared to previous versions. The old creature-cantrip package plus Flare of Denial has been replaced by a more compact configuration, with Hydroelectric Specimen as a flexible blue MDFC and the full playset of Force of Negation.
This choice makes the deck less dependent on the presence of small creatures on the field and more oriented towards a pure combo-control structure. Preordain and Stock Up add selection and resources, while Waterlogged Teachings increases the ability to find the right answers in long games.
The sideboard is also leaner: no overly narrow packages, but Consign to Memory, Mystical Dispute, Flusterstorm, and Engineered Explosives to cover the format's main angles. Tamiyo, Inquisitive Student offers a value plan against slower decks, while Island and Mountain mitigate one of the manabase's historical problems: effects that destroy lands and allow you to search for a basic.
In summary, the new Blue Belcher is less tied to obsolete ancillary lines and more focused on its best axis: finding Goblin Charbelcher, protecting it with a critical mass of counters, and using Tameshi, Reality Architect plus Lotus Bloom to turn every useful window into an immediate kill.